Below are instructions on getting your downloading, installing and general use of the BIM Holoview app.
Entering your Login Credentials:
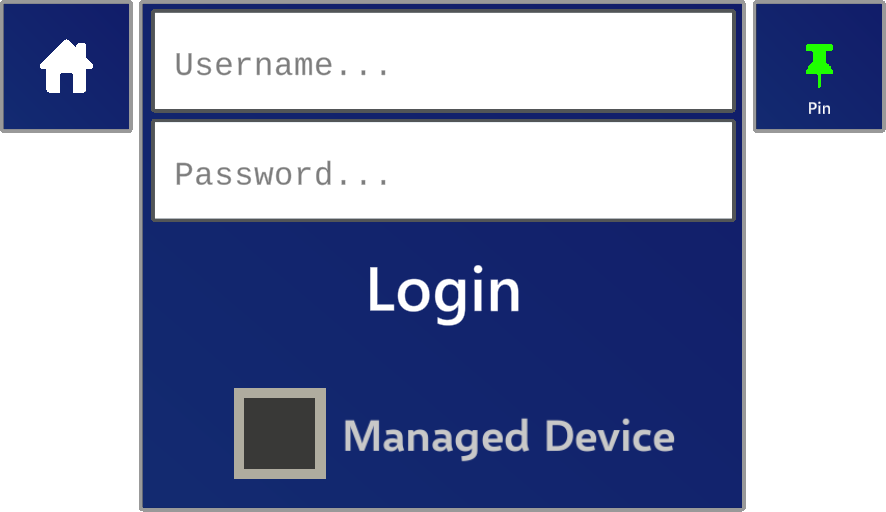
- Navigate to the Login page.
- Enter the same details you used to register on this website.
- Tap the Login button. You will be navigated to the downloads page, please wait until your models appear to continue.
- Once you are logged in the login page icon will be green.
|
|
Using Single-Sign-On:
- Navigate to the Login page.
- Ensure the Managed Device is checked, enter your username and tap on Get Token.
- This will send a request to the server, verify your Single-Sign-On details and send a 1-time use 6-digit code via email.
- Enter the code into the Code... field and tap Submit.
- You will be navigated to the downloads page, please wait until your models appear to continue.
- Once you are logged in the login page icon will be green.
|

|
|
Downloading a model:
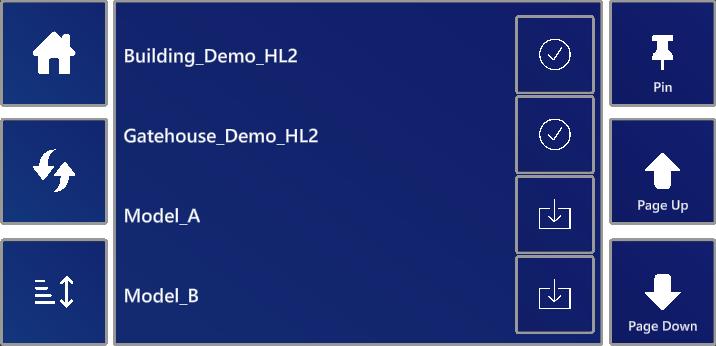
- Navigate to the Downloads page.
- Tap the download icon for the model you wish to download.

- An X icon will appear which you can tap to cancel the download.
- Once the download is complete you will see a Tick icon and that model can now be placed.
- Tap the Refresh icon to refresh your downloads list.
- Click the Sort icon to change between the different sort modes (this is persisted across downloads and placement):
- Oldest first
- Newest first
- Alphabetical
- Reverse-alphabetical
- Use the Page Up and Page Down buttons to scroll through your list of models.
- You may experience some slight freezing here as the model gets processed.
|
|
|
Placing a model:
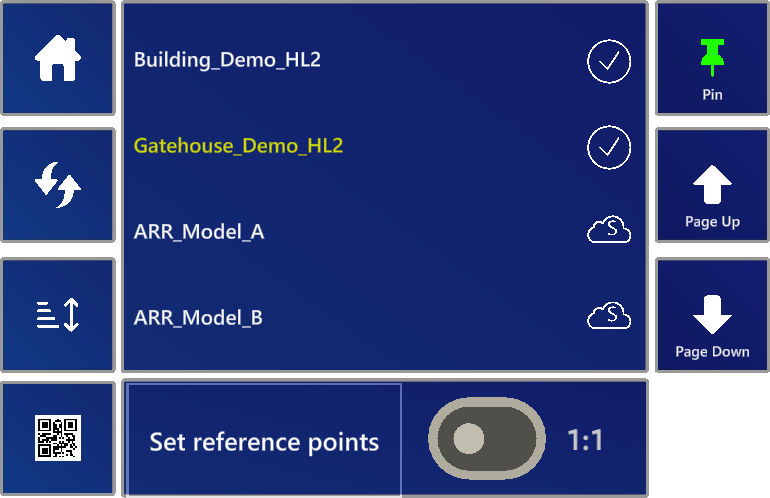
- Navigate to the Placement page.
- The model should now appear in the model list.
- If the model will be locally rendered it will have a tick icon.
- If the model will be remotely rendered it will have a cloud icon.
- It is the same process for placement regardless of where it is rendered.
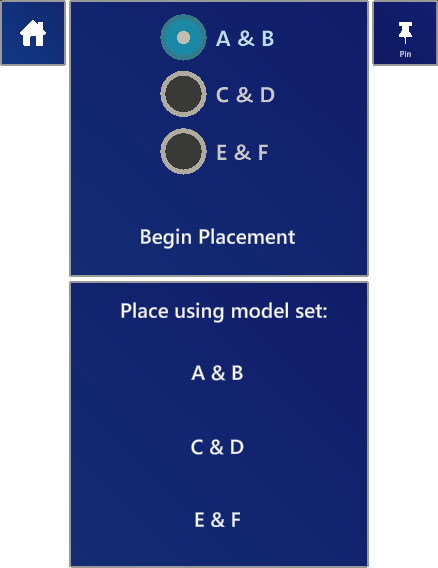
- Tap on the model you wish to place, it will be highlighted yellow.
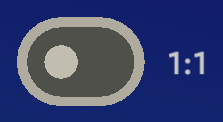
- Use the toggle switch to switch between 1:1 and table top.

- Tap on the placement button, it will say Set reference points or Place tabletop based on your placement type.
- For 1:1:
- If there is only 1 set of reference points in your model and it hasn't been placed before then it will go straight to placing the reference points.
- Otherwise it will go to the Placement Options page where you can select the desired reference points or use the Switch Model button to re-place the model where it was previously.
- If you are using a model set and a model within that set has already been placed this session, then another set of options will appear to use that model set's positional data when placing.
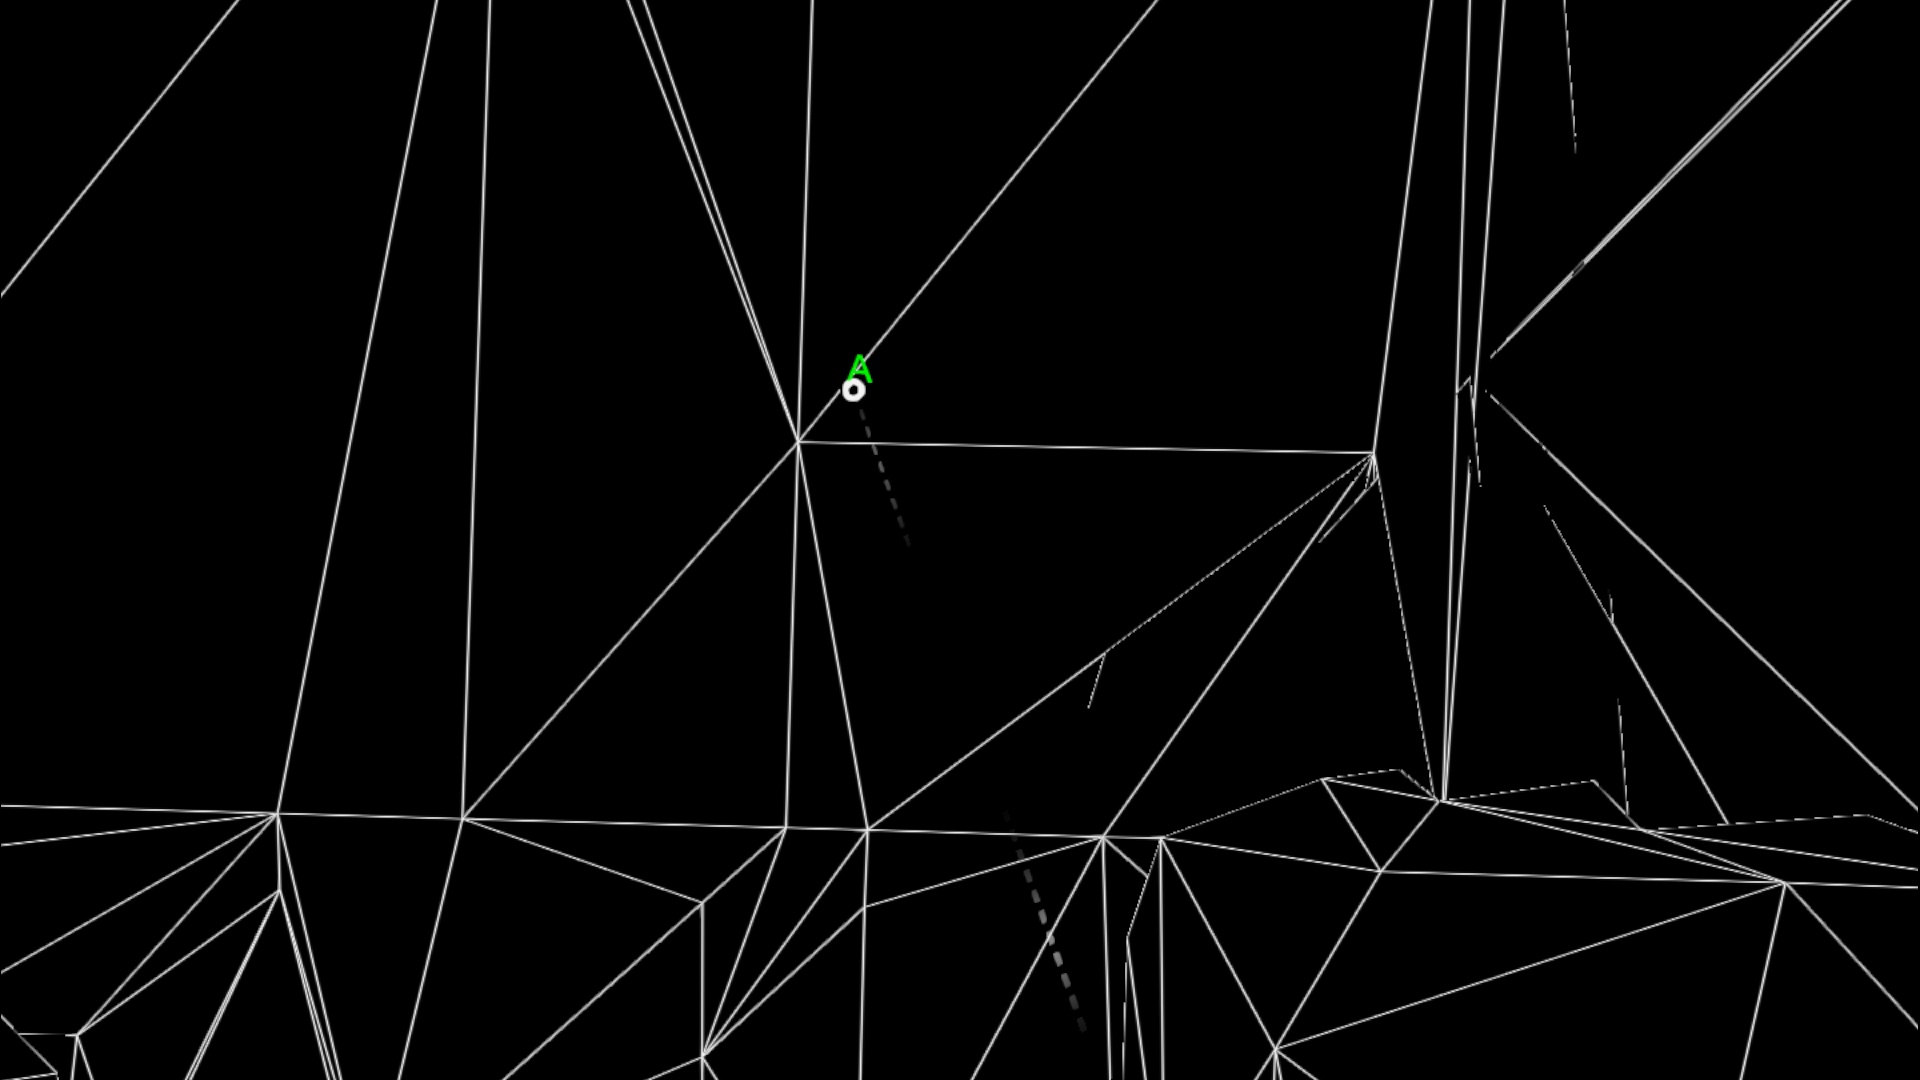
- Using the hand rays, air tap in the 2 spots where the reference points are.
- For Tabletop:
- It will load the model and place it roughly 0.75m in front of you.
- Tap the Refresh button to refresh the placement list.
- Click the Sort icon to change between the different sort modes (this is persisted across downloads and placement):
- Oldest first
- Newest first
- Alphabetical
- Reverse-alphabetical
- Use the Page Up and Page Down buttons to scroll through your list of models.
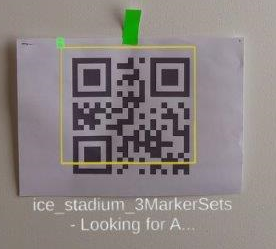
- For QR code detection tap on the QR code button.
- A yellow box will appear and start scanning for QR codes.
- Once it has detected a set of reference points for a single model (A&B, C&D, E&F) it will place the model with the points being at the top left corner of the QR code.
- Please ensure the QR code is oriented with the 3 big squares as in the picture.
- Bottom left.
- Top left.
- Top right.
|
|
|
Moving a model:
- For 1:1:
- Navigate to the Movement page.
- Grab the movement widget to move the model.
- To change the sensitivity grab the slider and changes its value with 0.1 being slower and 5 being faster.
- Select whether you would like to do a temporary movement.
- When the Temp movement button is tapped (red text) then it will save the current location so you
can move the model freely. Once you tap the button again it will move the model back to the originally saved position.
- When the Temp movement button is not tapped (white text) then all movement will be saved for the model.
- Use the + and - buttons to modify the view distance.
- To rotate, grab the handles to rotate the model. Note the movement is around the center of the model, not your location.
- Use the Widget Position toggle to switch the default starting height of the movement widget.
- If the Vertical Lock toggle is checked then the model will stay on the horizontal plane - it won't move up or down.
- Turn Teleport Mode on to use the hand ray cursor to teleport to different locations in the model
- Free will teleport to the cursor location.
- Horizontal will teleport to the cursor location without moving up or down.
- Vertical Offset will teleport to the cursor location, placing you approximately 1.7m above.
- For Tabletop:
- Grab the model with your hand inside it or using the far hand rays and drag it to your desired location.
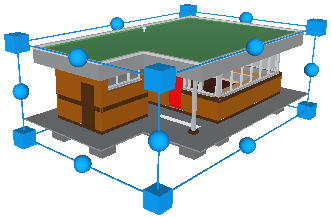
- Use 2 hands to scale, move and rotate or use the bounding box. For the bounding box, use the small cubes in the corners for scaling and the small circles in the middle of the lines for rotating.
- Changing the view distance allows you to see more of the model. It applies a viewing sphere around the user and anything past the distance (in meters) is not visible. Please note: this cannot be changed in tabletop mode.
|
|
|
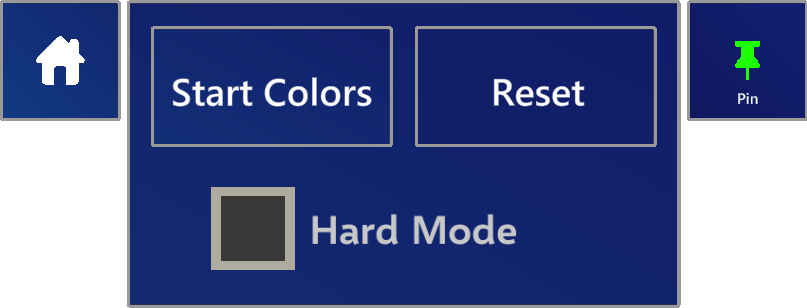
Changing transparency or color options:
- Navigate to the Colors page.
- Tap Start Colors when you want to start applying colors.
- Turn on Hard Mode to interact with the model. Tapping a part of the model will change its color. Tapping Start Colors will automatically turn on Hard Mode.
- Tap Stop Colors to stop applying colors.
- Tap Reset to reset all the colors back to their original color.
|
|
|
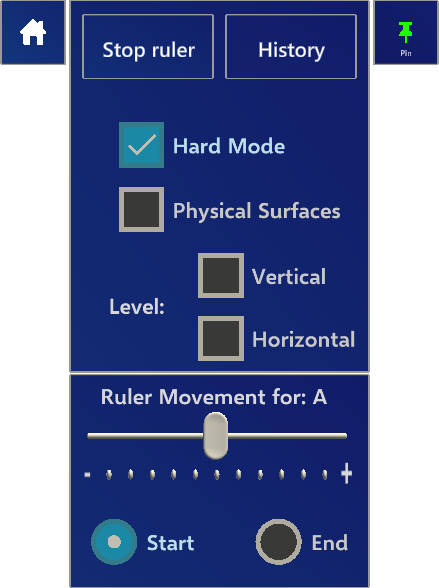
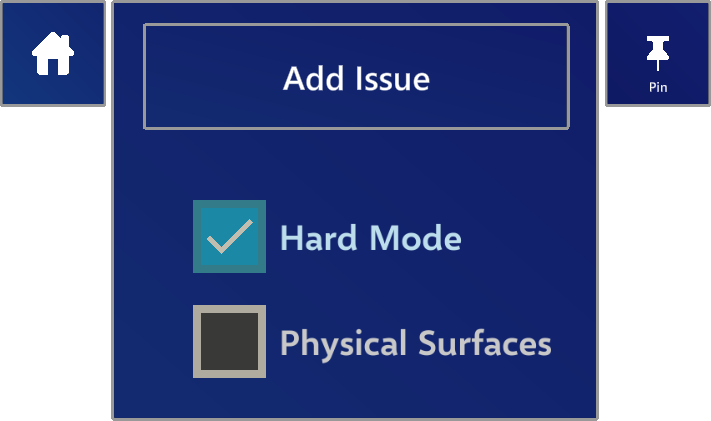
Ruler:
- Navigate to the Ruler page.
- Tap Start Ruler to begin placing a ruler.
- Hard Mode allows you to place a ruler on the model.
- Physical Surfaces turns the real world walls on/off so you can place a ruler on or through the wall.
- Tap on the History button to show your ruler history.
- Tap on the cursor select icon for a previous ruler to place the ruler again.
- Tap on the trash icon to delete that ruler.
- Tap on Clear All to delete all previously saved rulers.
- Once a ruler is placed you can move the start and end positions by the bottom panel.
- First place a ruler or select one from the ruler history list.
- Select either the Start or End to move.
- Grab the slider and move it + for increasing length or - for decreasing length.
- To level the ruler vertically or horizontally, toggle the Vertical or Horizontal level checkboxes prior to placing the ruler.
|

|
|
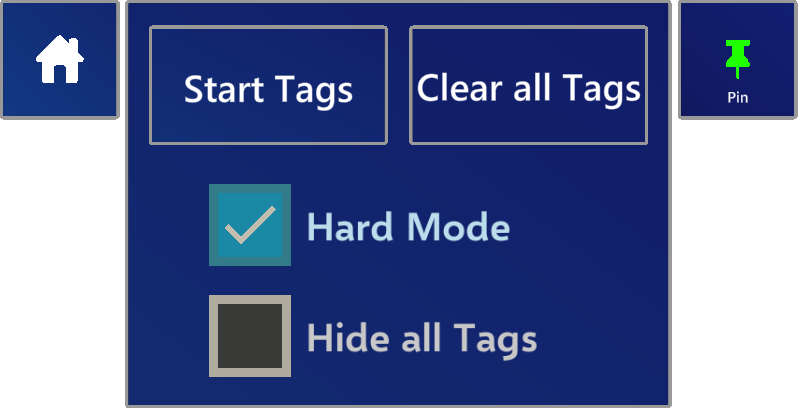
Properties page:
The Start Tags option will only be available if you have used the Plugins and the ‘Export Property Data’ option has been selected.
- Navigate to the Tags page.
- Ensure a model is placed and has properties otherwise you can't navigate there. To get properties for your model please upload your model through our plugins which can be found on their respective instructions. Revit & Navisworks.
- Tap on the Start Tags button.
- Hard Mode will be automatically enabled when starting tags.
- Once you are in Tags mode you may tap on any object in your model using the far hand ray and a new window will appear on that object close to you.
- This will display all property information we gathered from our plugin.
- Grab the panel or use the far hand ray and hold/drag the window to move it.
- Tap on the X to close that window
- Tap Stop Tags button to stop placing property tags.
- Tap Clear all tags to remove all current tags.
- Toggle Hide all tags to make the tag windows disappear and re-appear.
|
|
|
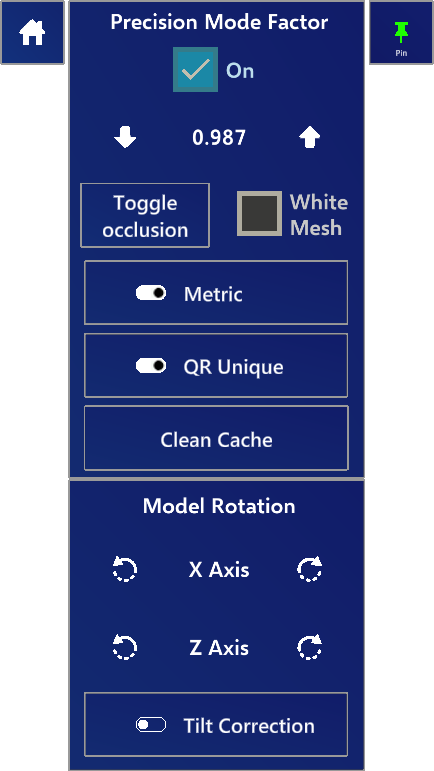
Changing default settings:
- Navigate to the Settings page.
- Tap on the Precision Mode Factor checkbox to toggle it on/off.
- The precision factor directly affects the model and ruler so we recommend testing the accuracy of the model/ruler and modifying the precision factor accordingly.
- Tap the Toggle occlusion to turn occlusion on/off.
- Please note: this may take a few seconds to appear.
- Tap the White Mesh checkbox to turn white mesh on/off.
- Please note: this may take a few seconds to appear.
- Use the Metric/Imperial toggle to switch the ruler measurement type.
- Use the QR Unique/Generic toggle to switch between searching for unique model's QR codes or generic QR codes. Generic QR codes will place the selected model from the placement page. Generic QR codes can be downloaded from here.
- Tap the Clean cache button to delete all downloaded models.
- The model rotation will rotate the model 90 degrees on the desired axis.
- Turning Tilt Correction on will ask you to place a Tilt point and then a Pivot point. Once both are placed, a movement widget will appear. Dragging the movement widget up/down will tilt the model around the pivot point from the tilt point. For quicker tilts, place the tilt point and pivot point closer together.
|
|
|
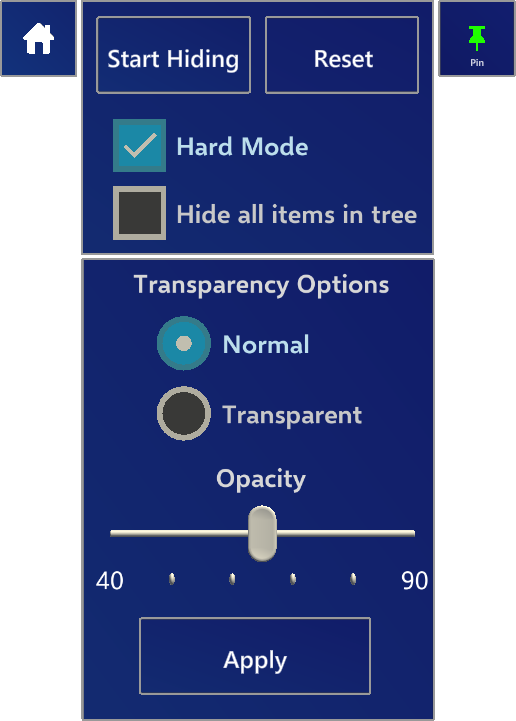
Hiding objects or changing transparency options:
- Navigate to the Visibility page.
- Tap Start Hiding when you want to start hiding objects.
- Turn on Hard Mode to interact with the model. Tapping a part of the model will hide it. Tapping Start Hiding will automatically turn on Hard Mode.
- Tap Stop Hiding to stop hiding objects.
- Tap Reset to reset all the hidden objects back to their original visibility.
- When Hide all items in tree is on, it will give you a prompt when clicking on a part of the model to hide all items for that group. It will navigate up the object heirarchy to find the best grouping option and hide the whole group if you select OK.
- To change the transparency option, select ether the Normal or Trasparent radio button and select apply. The level of transparency applied is based on the opacity level slider.
- Grab the Opacity slider to change the intensity of the transparency. An opacity level of 40 means it is 40% transparent.
|
|
|
Adding new issues:
- Navigate to the Add Issue page.
- Tap Add Issue when you want to start adding issues.
- Turn on Hard Mode to interact with the model. Tapping a part of the model will add a new issue at the exact location of the cursor. Tapping Add Issue will automatically turn on Hard Mode.
- Tap Stop adding issues to stop adding new issues.
- Tap Physical Surfaces to turn the real world walls on/off so you can place an issue on the model.
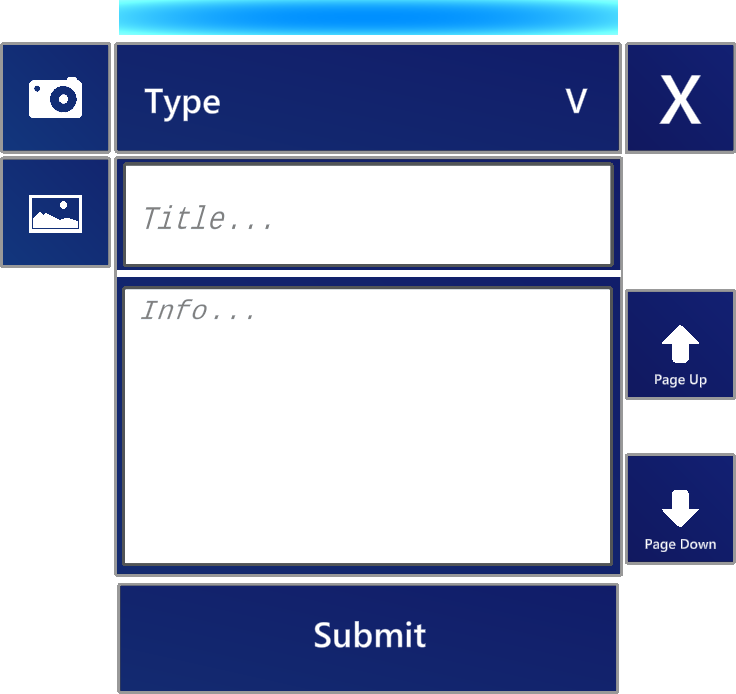
- Once you place a new issue, a new window will appear in front of you.
- If you would like to use one of your predifined types, tap the Type button and tap on your desired type. This will populate the Title and Info automatically. If the project is linked to BIM 360 then the issue cannot be created without a type.
- Otherwise you can tap on the Title and Info fields and enter the information via the popup keyboard.
- Tap on the Camera button to take a picture of the issue. Then tap the Take Photo button to take the photo.
- Tap on the Picture button to display/hide the picture. You can move the picture by tapping and dragging on it.
- Tap the Submit button at the bottom to upload the issue to the server. It will only be saved if you tap the submit button.
- Once the issue is submitted it will become active and a red tick icon will appear on the right. Tap the Red/Green Tick button to toggle its resolved status.
- Grab the blue bar on top to move the issue window.
|
|
|
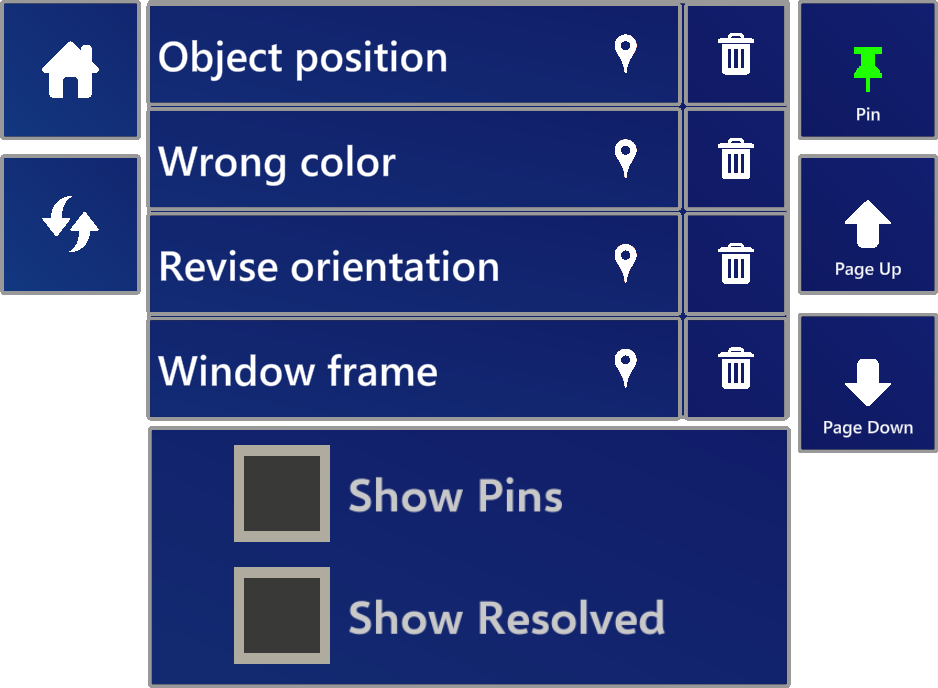
Viewing current issues:
- Navigate to the View Issues page.
- Tap on the Pin Icon for a previous issue to display the issue.
- Tap on the Trash Icon to delete that issue which will also delete it from the server.
- Tap on Show Pins to show all pins on the model.
- Tap on a pin that is on the model to display that issue.
- Tap on Show Resolved to show all resolved issues.
- This will also display their pins if Show Pins is selected.
|
|
|
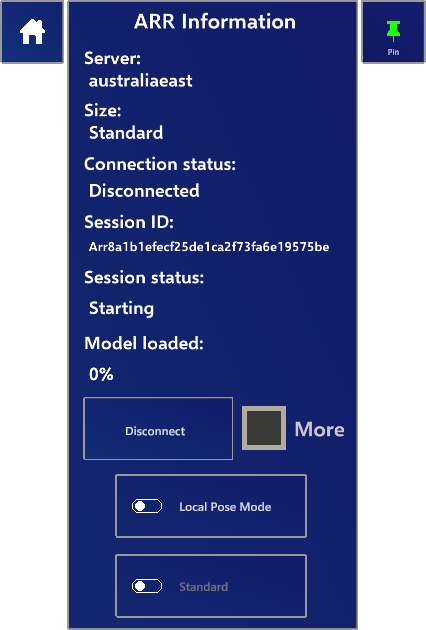
Viewing ARR information:
- Navigate to the ARR Info page.
- This page displays the important information when placing an ARR model.
- The server you are connected to.
- The status of the connection to the servers session.
- The ID of the session. For troubleshooting please note this down or take a screenshot.
- The status of the session you will be connecting to.
- The percentage of the model that is loaded. Once 100%, the model will be visible.
- Tapping on Disconnect will disconnect you from the current ARR session.
- Tap on the More toggle to display more in-depth connection information.
- The Pose Mode toggle will switch between Local and Remote. If you experience any wavyness/wobblyness with the model or UI in Local Pose Mode, then you can switch to Remote Pose Mode. There may be some lag when in Remote Pose Mode but it has a much better experience than local in tabletop viewing.
- The Standard/Premium toggle allows you to switch between standard and premium sessions. Larger models (>20 million polygons) will need premium sessions to be able to be viewed. Once changing the session type, a new session will need to be started to apply the changes.
|
|
|
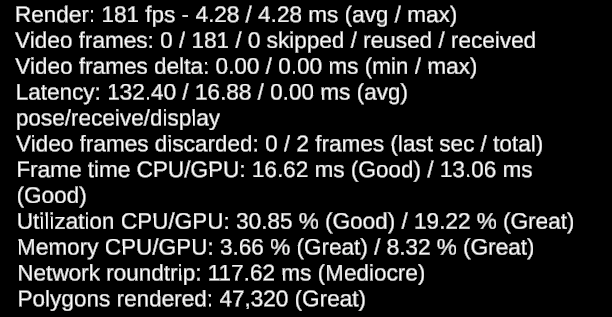
Notes:
- Here is an example image of the more in-depth ARR diagnostics display. This will appear and update in realtime with the connection to the server and it's statistics. This text will stay headlocked while it is toggled on.
- Each model downloaded is saved into the cache. So the next time you open the app you won’t have to download the model again, unless it is removed from the cache, which can happen when there is not enough room in the cache.
- You can clean/empty the cache by navigating to the Settings page and tapping on Clean Cache. This will wipe all currently downloaded models.
- You will stay logged into the app until another account is logged in.
- Once you get logged out the cache will be cleaned.
- The pin button will pin the UI in place so it will stop following you.
- Each time you place a tabletop model it will be automatically optimized based on how close to the model you are.
- If you lose the UI or it gets stuck behind a wall you can use the hand menu home button to bring it back. Bring your hand up, fingers facing towards the ceiling and palm facing you, and tap the Home button that appears.
|
|